


ELEGRP Digital Dimmer Light Switch for 300W Dimmable LED/CFL Lights and 600W Incandescent/Halogen, Single Pole/3-Way LED Slide Dimmer Light Switch, Wall Plate Included, UL Listed, 1 Pack, Matte White - -
- Category: Dimmer Switches
- Store: ELEGRP
Share on:
Description
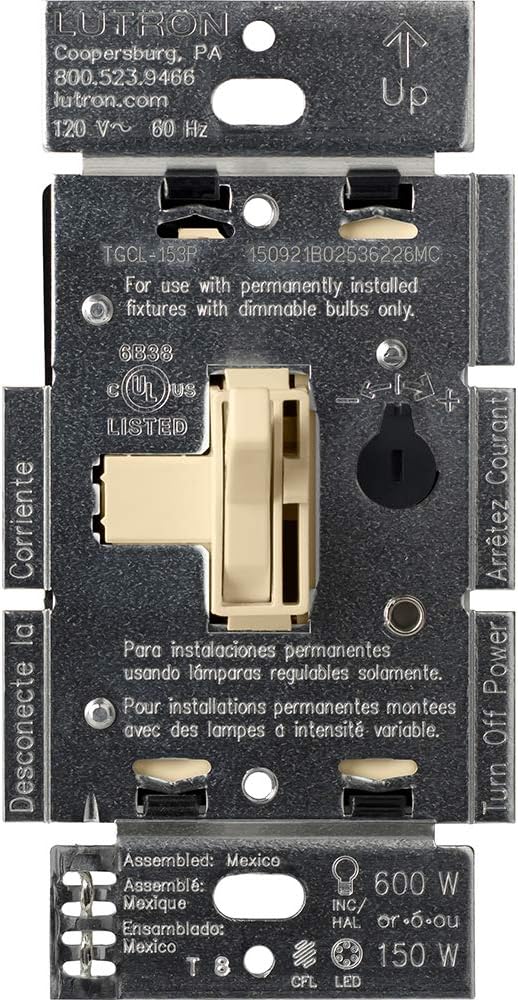
See more product details Digital Dimmer Switch: Digital circuit technology enables the smooth dimming of the widest range of LEDs Universal Compatibility: Works with 99% of dimmable LED, CFL, Incandescent & Halogen light lamp bulbs Single-Pole or 3-Way: Can be used in single-pole or 3-Way applications NO NEUTRAL WIRE REQUIRED: Ideal for homes of all ages High Quality: Energy-saving and long operating life. Tough thermoplastic housing shrugs off impacts and scratches. UL & CUL listed Ultra-Slim Profile: Easily fits in the electrical box and wall plate Works with dimmable LED/CFL rated up to 300W, Incandescent & Halogen light lamp bulbs rated up to 600W on the market. No derating is required in dimmable CFL or dimmable LED multi-dimmer installations. You can adjust your lamps to the desired level for acquiring preferred brightness, bright level for reading, working, studying while the dim level for creating a perfect ambient atmosphere. NO NEUTRAL WIRE REQUIRED makes it ideal for homes of all ages. You don't need a new home to set the right light. A white LED locator light glows when the dimmer switch is OFF for easy location in the dark, but never disturb a good dream. 1. Connect the green or bare copper wall box wire to the terminal screw marked "GR". 2. Connect the Line Hot wall box wire to the terminal screw marked "BK". 3. Connect the Load wall box wire to the terminal screw marked "RD". 4. Remaining dimmer terminal screw marked "RD" should have an insulation label affixed. DO NOT REMOVE this label in a single pole application. 1. Connect the green or bare copper wall box wire to the terminal screw marked "GR". 2. Connect common wire (Line hot or Load) to the terminal screw marked "BK". 3. Connect the first traveler wire to the terminal screw marked "RD". 4. Remove insulating label and connect the second traveler wire to the remaining terminal screw below marked "RD".
Product Overview
We Recommend