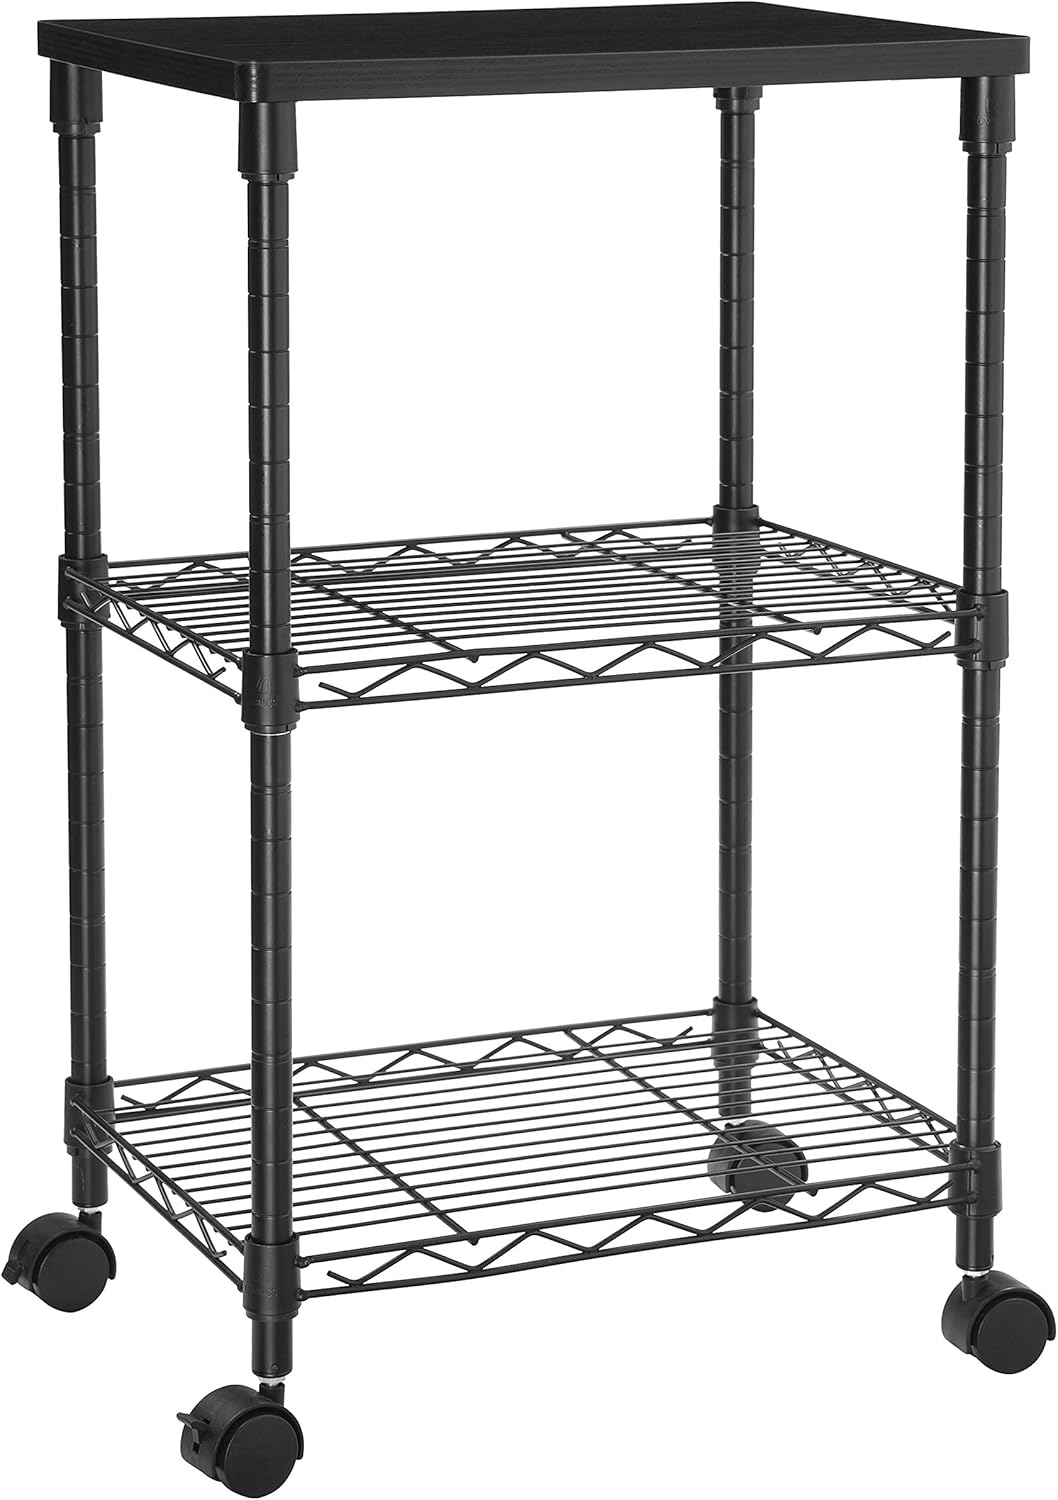


SONGMICS Printer Stand, 3-Tier Rolling Printer Cart with Wheels, Fax Stand with 2 Height-Adjustable Mesh Shelves, Metal Frame, Screw-Free Assembly, for Home Office, Black ULGR303B01 : Office Products
- Category: Printer Stands
- Store: SONGMICS
Share on:
Description
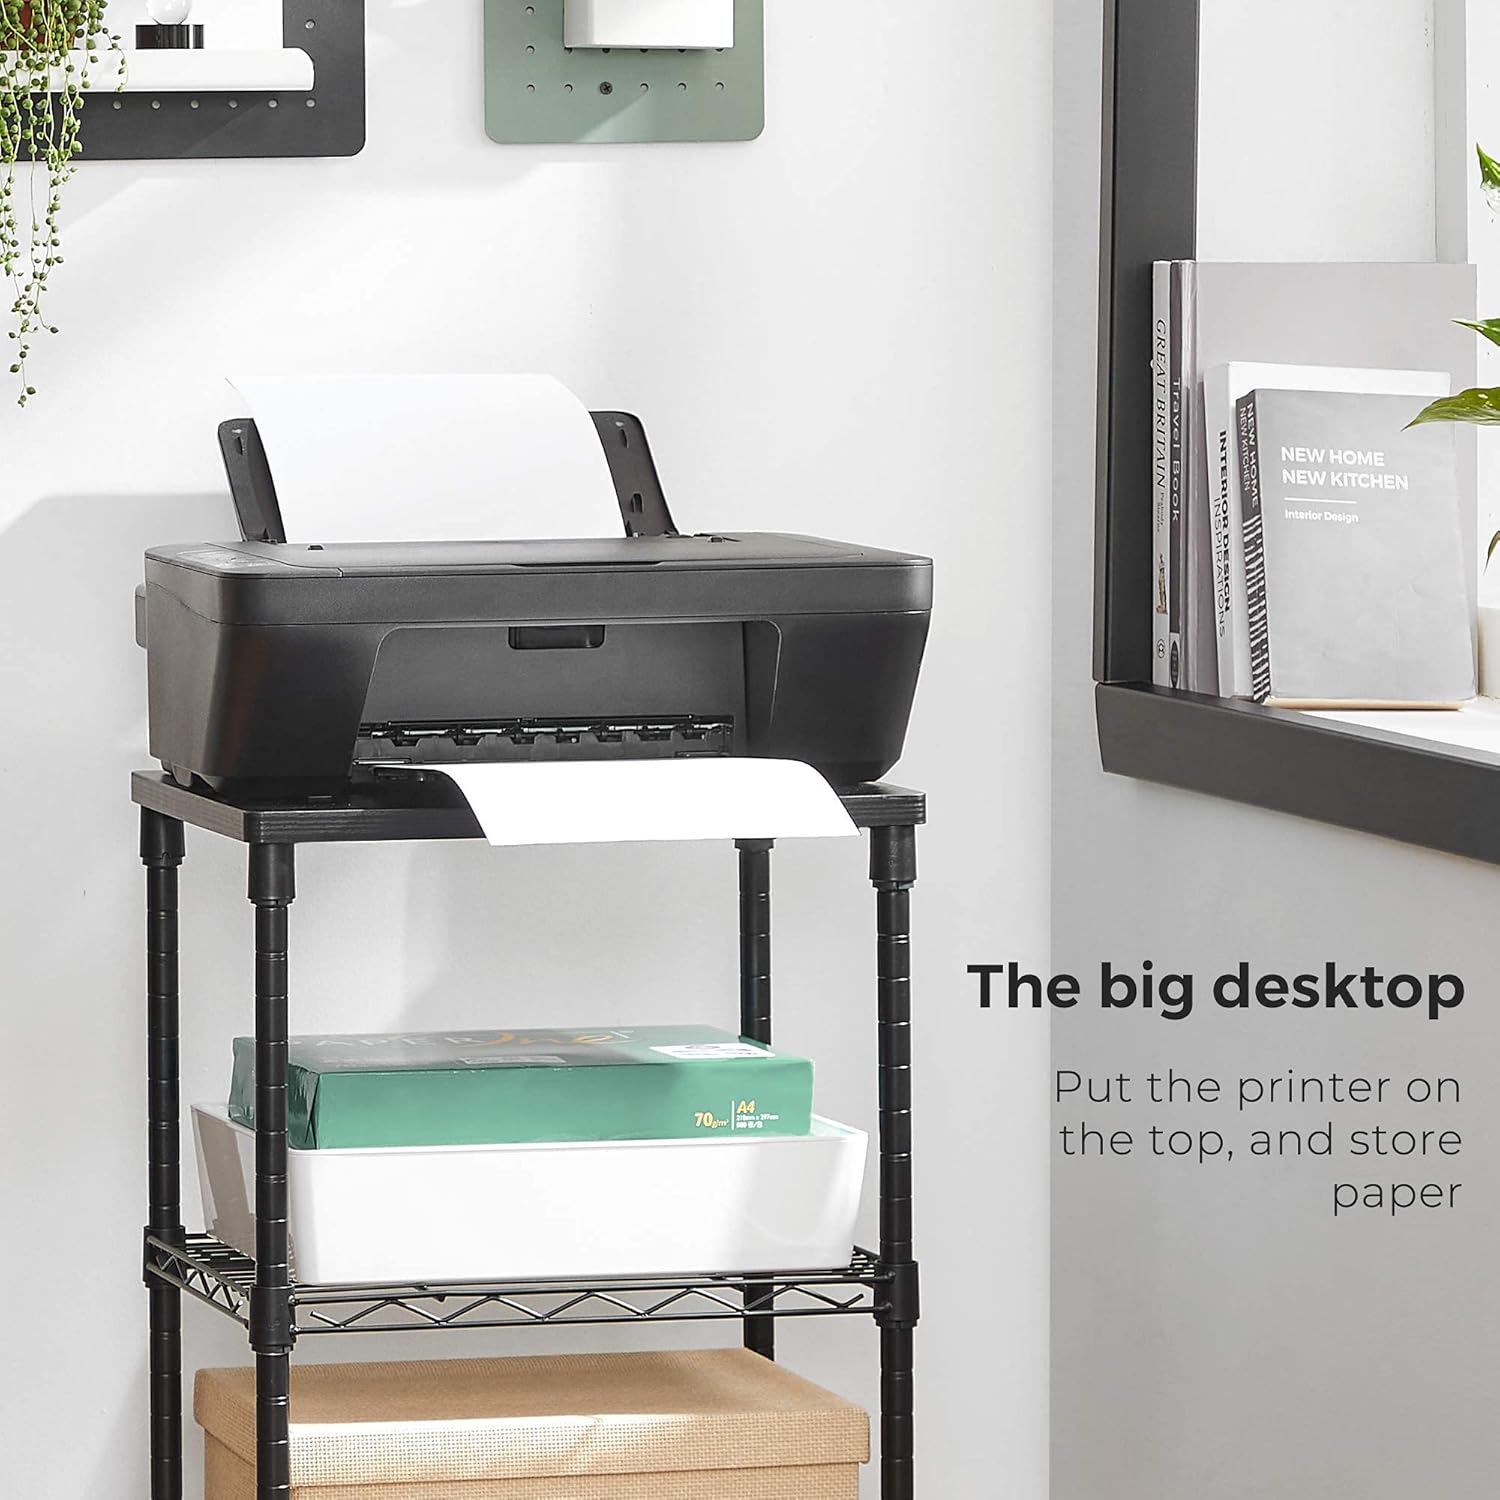
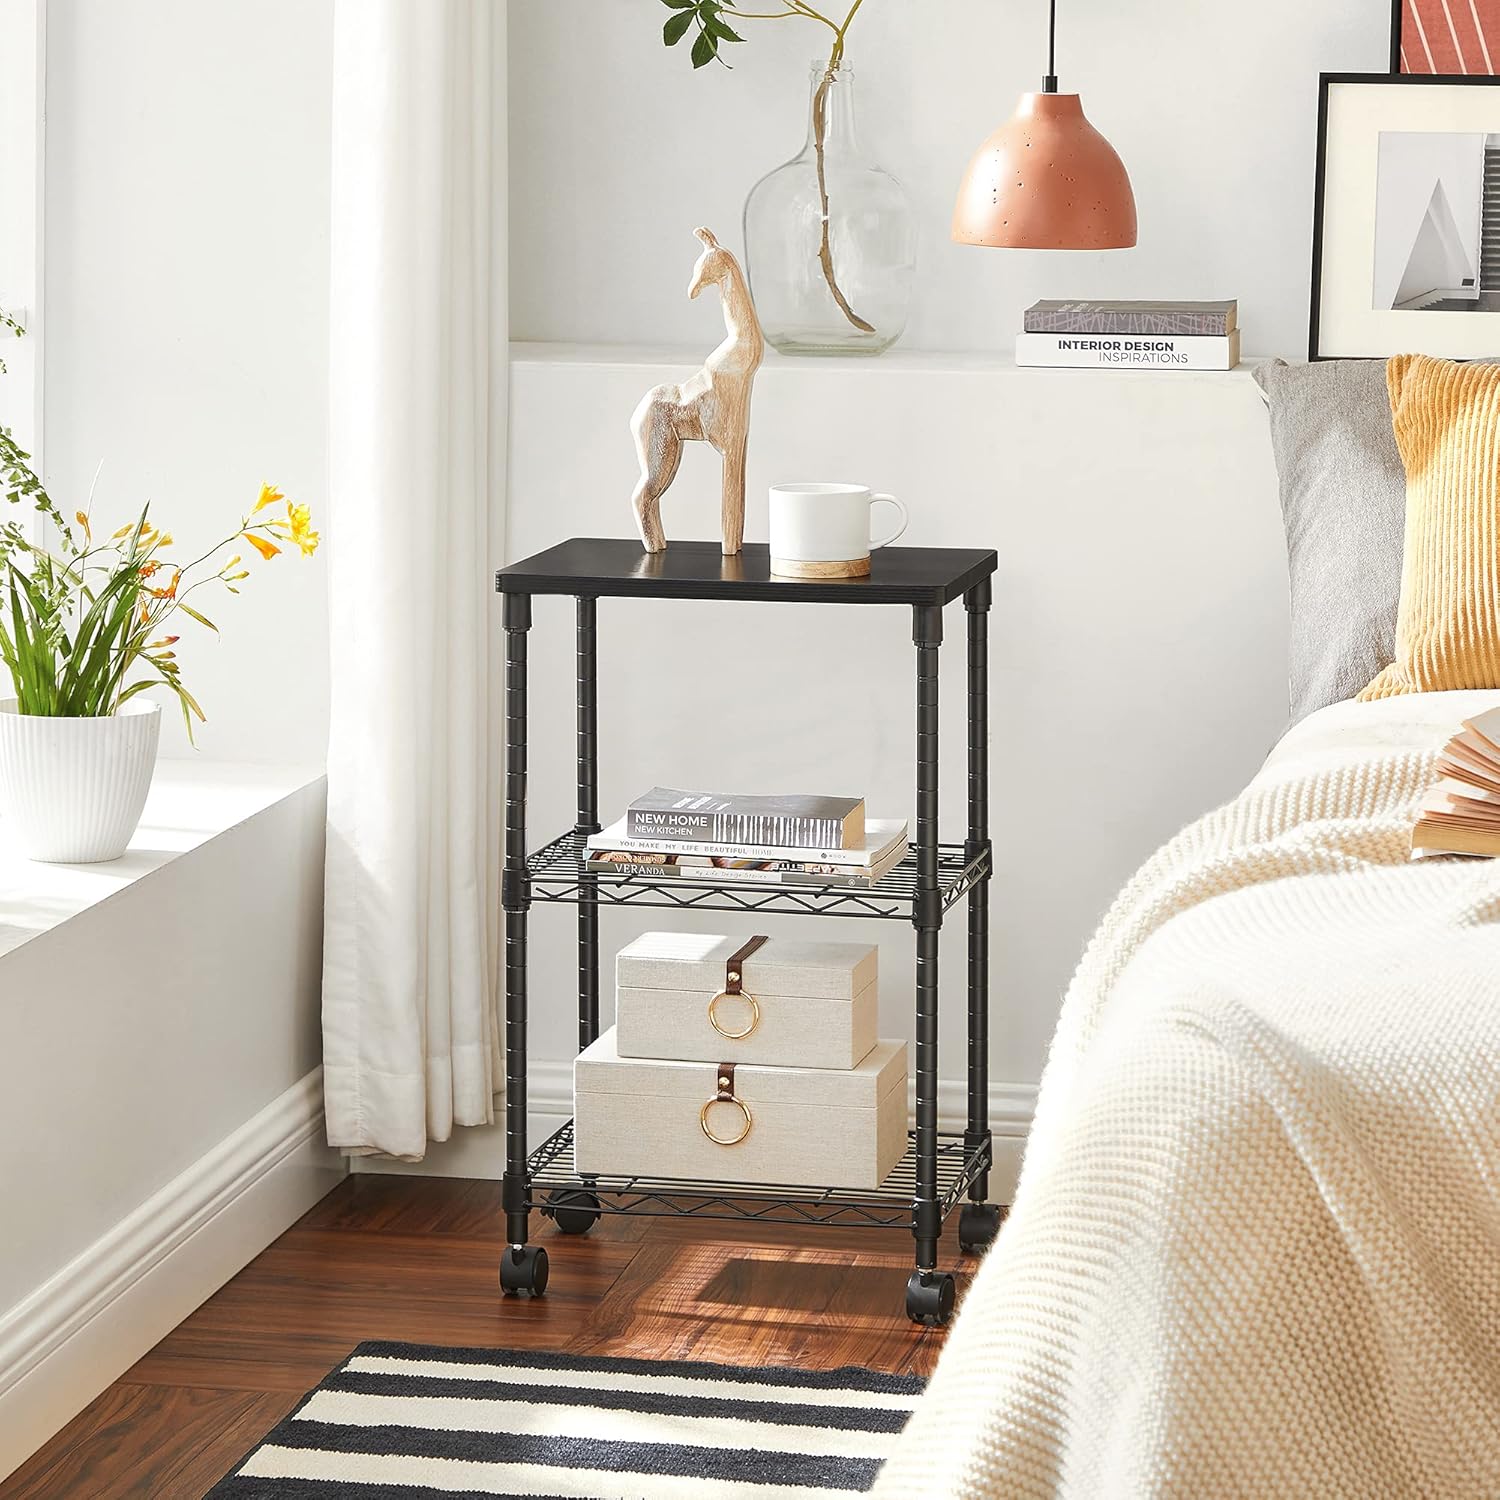
The metal shelves are adjustable, so you can adjust the distance between shelves to fit both tall and short items. With no screws involved, the stand is easy to assemble. Please note that the “TOP” arrow should always face upwards. Supported by powder-coated steel and reinforced by the triangular structure, each metal shelf can hold up to 44 lb, and the wooden shelf 66 lb. The corners are rounded to protect you from bumps and scratches. The plug-in design gives a clean look while making it easy to assemble. 4 wheels allow you to move it wherever you need it with ease. 2 wheels have brakes so you can keep the rack in place when in use. The package is reinforced with thick foam around the corners, so you won’t worry about anything breaking during shipping. Where Do You Put Your Printer? On the table top? Or on the floor? When you find yourself having no space to set your office supplies close by, or trying hard to bend down and get your copies, it’s time to create your printer its own little corner with a printer stand. Printer up Top, Papers Below: Put the printer on the top, and store paper, ink, and other supplies on the metal shelves so they are always at hand when needed. The metal shelves of the printer stand are height-adjustable to fit items of different heights. Printer Stand on Wheels: Featuring 4 wheels, you can easily move the stand so that you can clean the area underneath, or roll it from one room to another if required. 2 wheels with brakes allow you to keep it in place next to your table. Specifications: Color: Black Material: Metal, Particleboard Product Size: 16.1”L x 12.2”W x 26.8”H (41 x 31 x 68 cm) Product Weight: 10.6 lb (4.8 kg) Max. Static Load Capacity of Wooden Top: 66 lb (30 kg) Max. Static Load Capacity per Metal Shelf: 44 lb (20 kg) Package Contents: 1 x Printer Stand 1 x Instructions SONGMICS Notes: When assembling the plastic clips, keep the “TOP” arrow facing upwards. After assembly, check the clips and make sure they don’t move up and down. Click the plastic clips precisely on the notches to make sure each shelf is at a horizontal level. When assembling the shelves, tap the corners of each shelf with a mallet to ensure stability. Do not put overweight items on the product.
Product Overview
We Recommend