


Stitcher Sewing Awl,Knoweasy Sewing Awl Tool Kit for Leather Sail and Canvas Heavy Repair
- Category: Tailors Awl
- Store: knoweasy
Share on:
Description
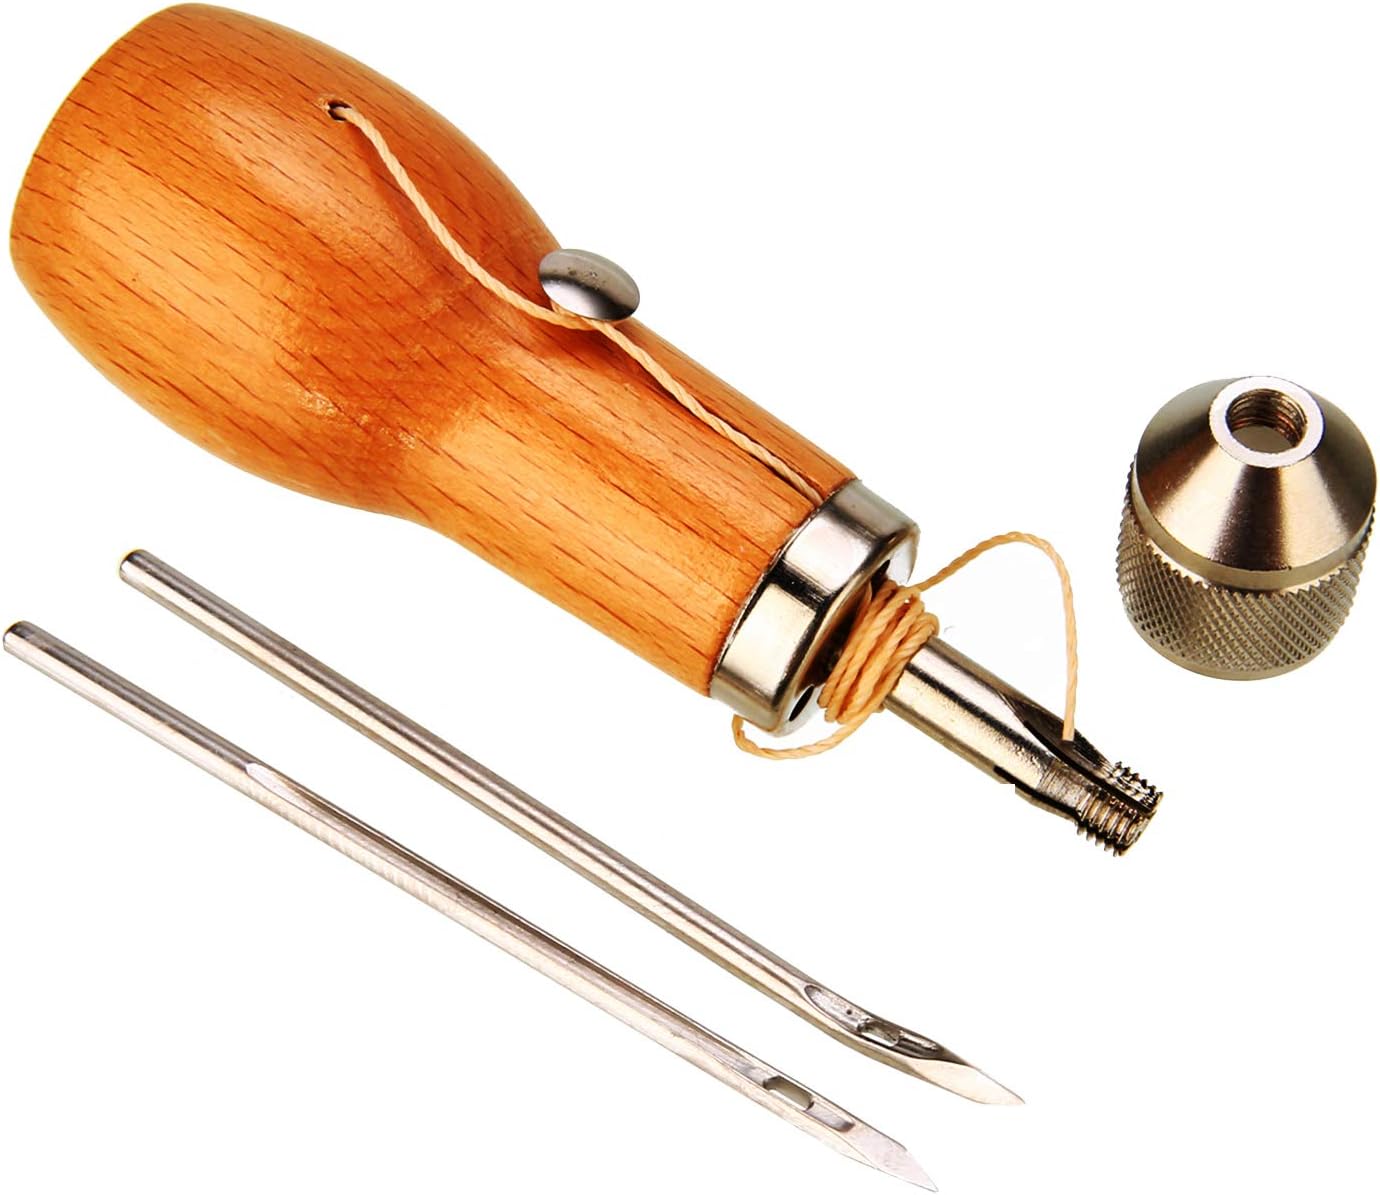
Feature: Sews every heavy materials Great for repairing tents, backpacks, sleeping bags, upholstery, the flexibility to have your own kit Single Awl includes a sewing awl, a spool of high tensile strength waxed thread (approx. 14 yards), 2 custom diamond point needles (1 straight and 1 bent needles # 8) and instruction. High tensile waxed coarse polyester thread in 180 yards (approx 162m) is up for grabbing. use this coarse thread with coarse thread needle so the tensioning effect of the speedy stitcher works efficiently. These needles make dewing a breeze using the reliable Speedy Stitcher Sewing Awl. Use curved coarse thread needle for sewing in awkwardly tight sewing spaces. Straight fine thread needle is for use when with the fine waxed ployster thread on lighter work. It is important to use coarse thread for either of the coarse thread needles; and fine thread for the fine thread needle so the tensioning effect of the stitching works efficiently. Repair tents, backpacks, sleeping bags, and tarpaulins as new Package Included: 1 X Sewing Tool 2 X Needle 1 X Waxed Thread Item: Sewing Tool Material: Metal + wood Color: As picture Length: Approx. 120mm/4.72in. Application: Leather/canvas items With the bobbin securely in the handle and the needle in its post, pull thread out of the hole and loop around the tension post then through a slot and hole in the handle leading to the threaded post. Continue up the post into a recession carved into it, and finally into the needle through a channel for the thread. Secure the chuck lock, making sure the thread is properly situated in the recession so as not to be crushed. Once the lock is secured, you should be able to pull string out of the needle with little effort. Plunge your awl into where you’d like to begin your stitch, then pull out as much thread as the length of what you’d like to stitch plus around three inches through the needle. Hold the thread steady, then pull your awl and needle out of the hole leaving thread behind. Push your awl into the material to create a second hole, then pull back until the thread on the awl forms a loop. Thread the entire length of the other end of thread through this loop. Pull the awl out of this hole, pulling on both ends of the thread with equal tension forming your first stitch. Continue this procedure in the following stitches, releasing thread from the awl with the end cap as needed. One good way to finish an awl stitch, if you don’t mind the look of a knot at the end, is to tie a knot instead of looping the last stitch. Push the awl in as in a normal stitch, then pull out around three inches of thread through the needle. Cut the awl loop thread and tie this to the already-loose end with a square knot. Another method is to stitch like normal on your last stitch, then stitch backwards with your awl, placing the needle into the second-to-last stitch and looping then the third-to-last hole and possibly another loop if you’d like to be really sure of yourself. Pull the awl out and tighten like normal, then cut each end off.
Product Overview
We Recommend


